The frequency of screen capturing has been increased 100 times ever since I started blogging in Steem. No ways work better a single picture to tell the story in a blog and I have been focusing on the formatting to make the blog looks good and reading friendly. That could mean a lot of learning curves in Markdown language which I never heard of prior to joining Steem. Sometimes a little HTML tricks to deal with unique formatting that Markdown could not achieve. But I never pay attention to another important element in my blog, the screenshot or whatever graphic elements.
The trick is simple - Adding drop shadow effect under the picture
Take a look at the comparison below, the above screenshot is snipped normally with Windows snipping tool without any effect and the bottom one is accompanied by a shadow effect.
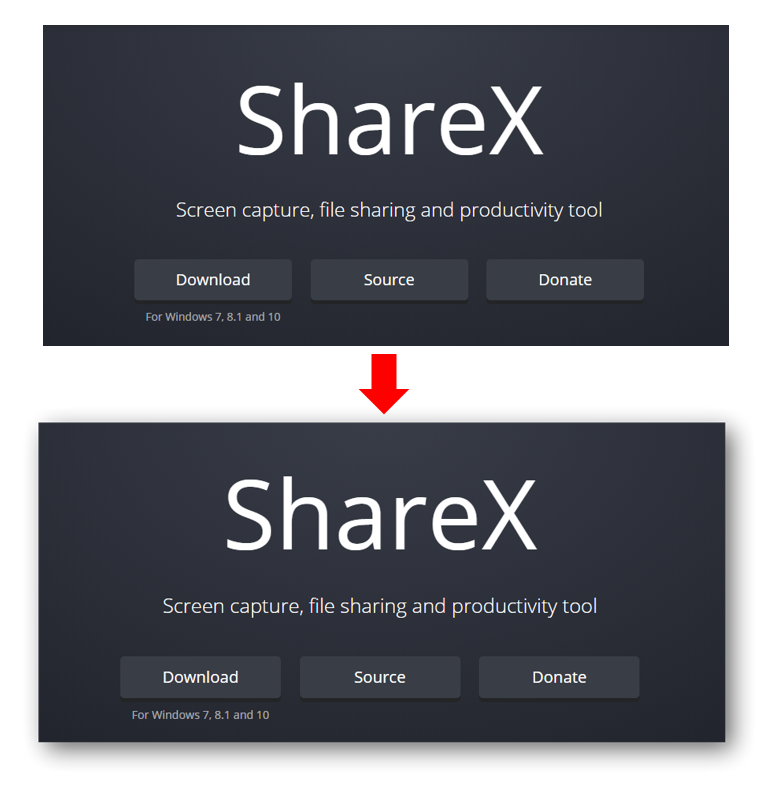
Although both pictures will bring out the same meaning but undoubtedly the bottom image looks more aesthetically pleasing. The reason behind is simple, a drop shadow below the image object will gives the main object some depth of view. As in the image is floating above the canvas hence looks more real.
How to do it?
There are many ways to add a shadow effect to any picture. The most complicated one could be the Photoshop way but I’m not so dedicated enough to tune up every single of my graphic content via PS. The simpler way could be making use of the Microsoft Word editing ability. However, ShareX beat them both
ShareX is simply a godlike screen capturing tool that meets each of my needs.
- Open source so that you don’t have to worry about the safety issue.
- Lightweight that cost almost nothing on the OS.
- Zero Advertisement so nothing bothers you while using it.
- Tons of features complimenting the screenshot ability.
- Free because it is open source!
Configuration of ShareX for the shadow effect
Install the ShareX, right-click on the icon under the toolbar and select Task Settings. On the left panel, select Effects and choose Image effects configuration.
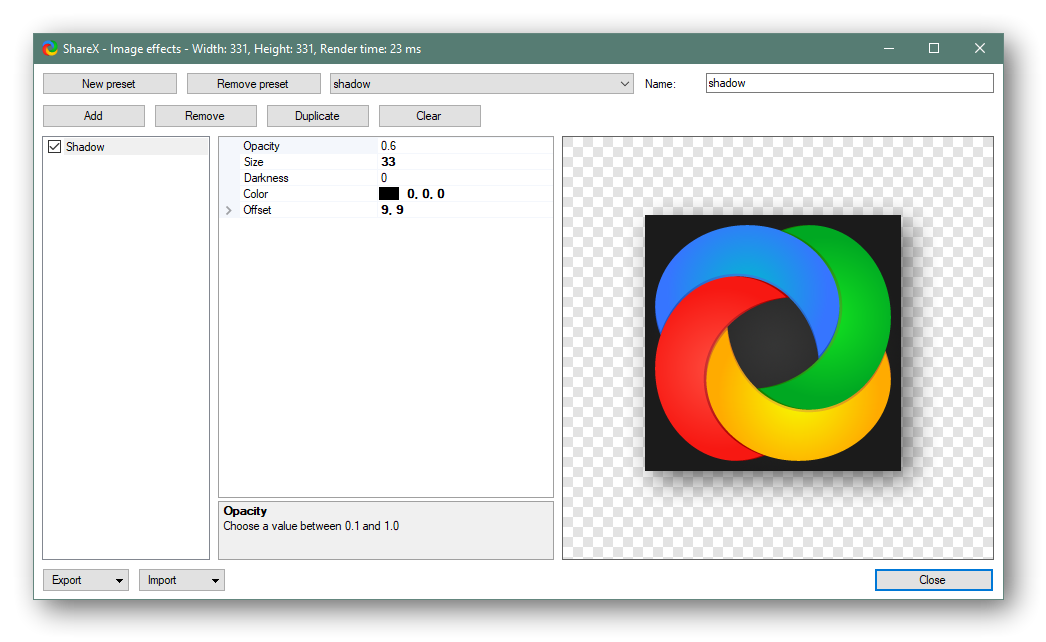
Add -> Filters -> Shadow for new shadow effect to configure. This is my configuration but you always welcome to experiment and create a unique effect to your liking. The right portion would be the preview pane for the configuration.
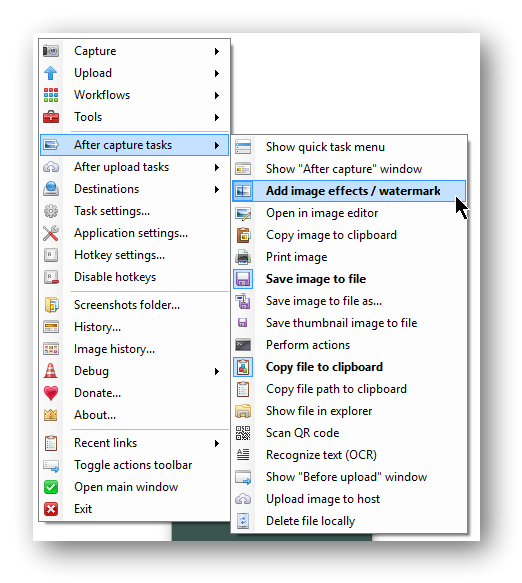
To make the shadow adding process more fluent, right-click the ShareX icon under toolbar and go to After capture tasks then Add image effects/watermask. This will allows ShareX to auto implement the shadow effect after every capture task so there will be no need for the manual effect rendering process.
Last tips
While you can copy the captured task to the clipboard and conveniently upload to any image hosting service or Steemit/Busy.org text editor, the transparency for the shadow effect will be lost. So make sure the upload is from the saved file.
What do you think about this trick?
Posted from my blog with SteemPress : https://fr3eze.vornix.blog/make-any-screenshot-instantly-attractive-by-using-this-trick/
This page is synchronized from the post: ‘Make any Screenshot instantly attractive by using this trick’