Drawitbetter Contest #6 Horse 马

IMG_20171209_010439.jpg

I’ve spent 2 hours using white pencil and pen on this negative artwork.

This is an entry for the Horse drawing contest hosted by @sirsensei.

Horse is my Chinese Zodiac for being born at 1990. Not bad drawing something that can somehow represent my generation.

这幅作品花了两个小时在黑色绘画本上,主要使用白色铅笔和墨笔。这同时也是 @sirsensei 所举办以马为主题的绘画比赛,有时间就来玩玩吧。

是我这个 90 后的生肖,画些某种程度上能够代表自己的东西挺不错的。

The Drawing Breakdown

IMG_20171208_230858.jpg


IMG_20171208_231554.jpg


IMG_20171208_233131.jpg


IMG_20171208_235630.jpg


IMG_20171209_000541.jpg


IMG_20171209_010439.jpg


This page is synchronized from the post: ‘Drawitbetter Contest #6 Horse 马’

Start edit screenshot with ShareX powerful editing tool

ss

In the last post we know ShareX is a very powerful screen capturing tool. Read more introduction about ShareX at this link:

TechReview #2 - Ultimate screen capture weapon, ShareX.

Previously when I use the default screen capturing tool in Windows, Snipping Tool to capture screen, often I will have to edit the picture with Microsoft Paint to make simple adjustment such like adding arrows, text, or brackets.

The flow of overall process was

Start Snipping Tool -> Open capture mode -> Capure screen -> Save as picture -> Look for picture location -> Edit with Paint -> Save and done

Using ShareX, the process will be

Start ShareX in capture mode Hotkey -> Capture screen -> Edit with ShareX -> Save and done

I’ll show you the basic screen capturing process and the awesome edit feature.

The Walk-Through

1111.png

Ignite ShareX region capture mode by Ctrl + Print Screen. The selection will form a dotted-line region on objects, click once to capture whatever inside the bracket or you can just click and drag over the screen for custom capture.


2.png

The captured image will be generated in the file list, we are using the 1.png in this example . Right-click on the image and select Edit image, this will start the built-in editor.


2017-12-07_13-58-33.gif

There is a top bar with a series of editing tools like drawing rectangle and circle, text, arrow, blur effect, crop image and so on.


2017-12-07_14-02-27.gif

Drawing Circle and Rectangle is a very basic feature of most editors. Default color is red which is suitable for emphasizing in an image. You can draw the form and later change the shape and size as well the as the position.


2017-12-07_14-03-55.gif

Drawing Steps is useful in introducing procedure by adding numbering at random places.
Drawing Text and Drawing speech balloon can be used to adding explanation or note.
Both of the results can be altered as desired after first creation.


2017-12-07_14-05-00.gif

Drawing Cursor enabling user to add mouse cursor in any place. This trick could be used in a tutorial image to tell the reader where to click on the corresponding image.


2017-12-07_14-06-36.gif

Effect Blur and Effect Pixelate are really useful in hiding sensitive information in an image which could be the car number plate, home address, name of a person, face of a person and contact number etc.


2017-12-07_14-07-15.gif

Crop Image is a vital tool in simple image editing tool to get rid with the unwanted portion of the photo or you might just want to crop to better ratio.

Tips: Beware this is a dangerous tool here as the image will be cropped the moment you release the click as you can see in the GIF. And there will be no “Undo” option to go back after the crop which I think this can be the next improvement.


2017-12-07_14-09-05.gif

Image allows user to flip and rotate an image. Horizontally and vertically flipping, 90 and 180 degrees rotating. Also, image and canvas size can be altered using this tool too.


2017-12-08_15-11-37.gif

Drawing Image is one of the more advanced features to allow a user to duplicate selected portion and drag it around to cover the other part of a photo. In the GIF, I managed to cover up the image preview with the alpha background. This to me is really convenient as I won’t need to access the Gimp or Photoshop to achieve the same effect.


Conclusion

The edit function is a killer feature for me to be a big fan of ShareX. It tremendously simplifies the process of creating a meaningful screenshot in no time.


Posted on Utopian.io - Rewarding Open Source Contributors


This page is synchronized from the post: ‘Start edit screenshot with ShareX powerful editing tool ‘

Ultimate screen capture weapon, ShareX.

Screen shooting has been a big part of my Steemit blogging activity. In Windows platform, the Snipping Tool is one of my best friends and I thought it was easy to use and handy to perform the simple print screen job until I met ShareX.

I would not even say ShareX is the Snipping Tool on steroid. If Snipping Tool is a rookie, ShareX is the Michael Jordan on the court.

While the former just able to simply capture screen via usual rectangle or free form, and provide some simple tool like Pen or Highlighter to edit. ShareX is a monster who can do way more than that.

ShareX is a free and open source program that lets you capture or record any area of your screen and share it with a single press of a key. It also allows uploading images, text or other types of files to over 80 supported destinations you can choose from.

Github repo: https://github.com/ShareX/ShareX
Official site: https://getsharex.com/
Platform: Windows

The Walk-Through

1.png

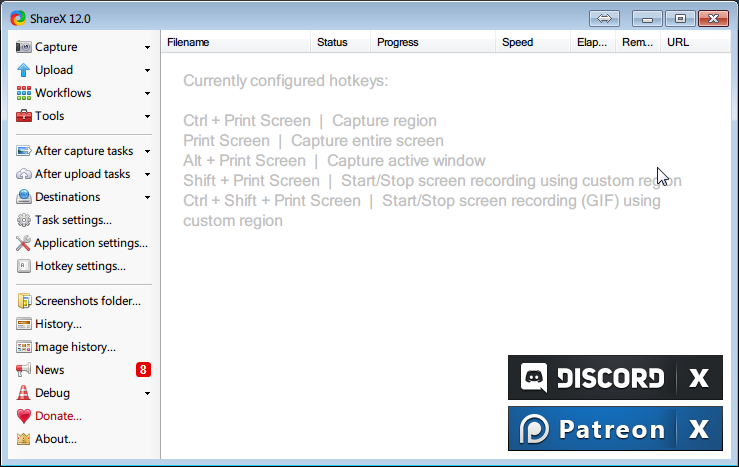
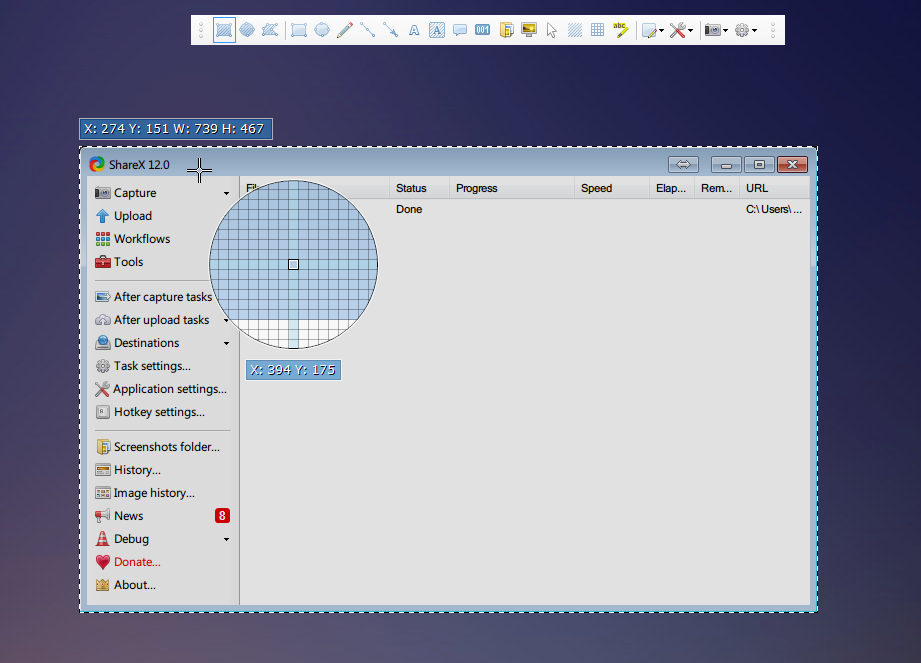
This is the main interface which might seem complicated than the innocent looking of Snipping Tool, one should get along very well with it after 10 minutes of some practicing.

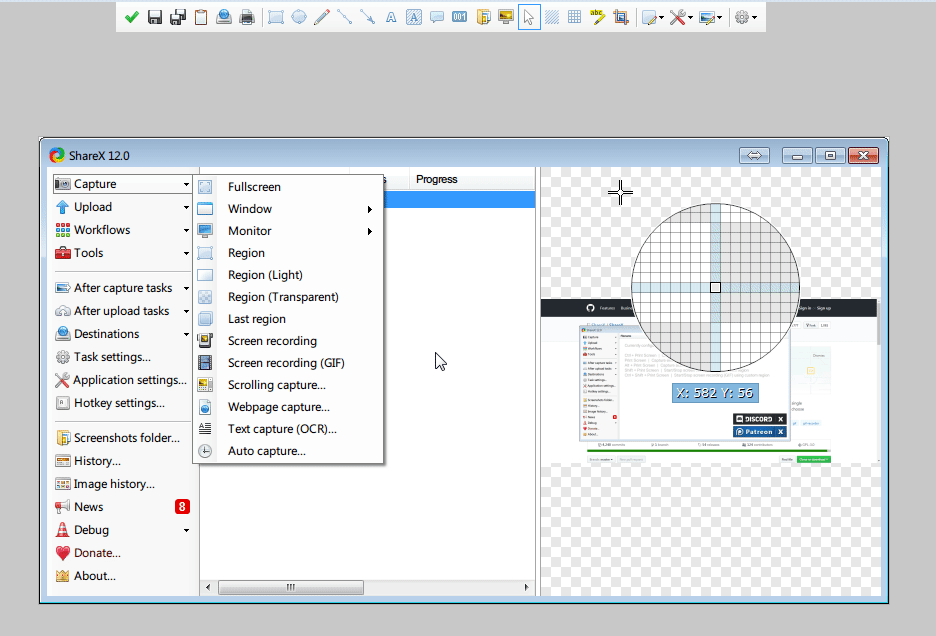
Left sidebar consists of all the features with the four main functions at the top: Capture, Upload, Workflows, and Tools.
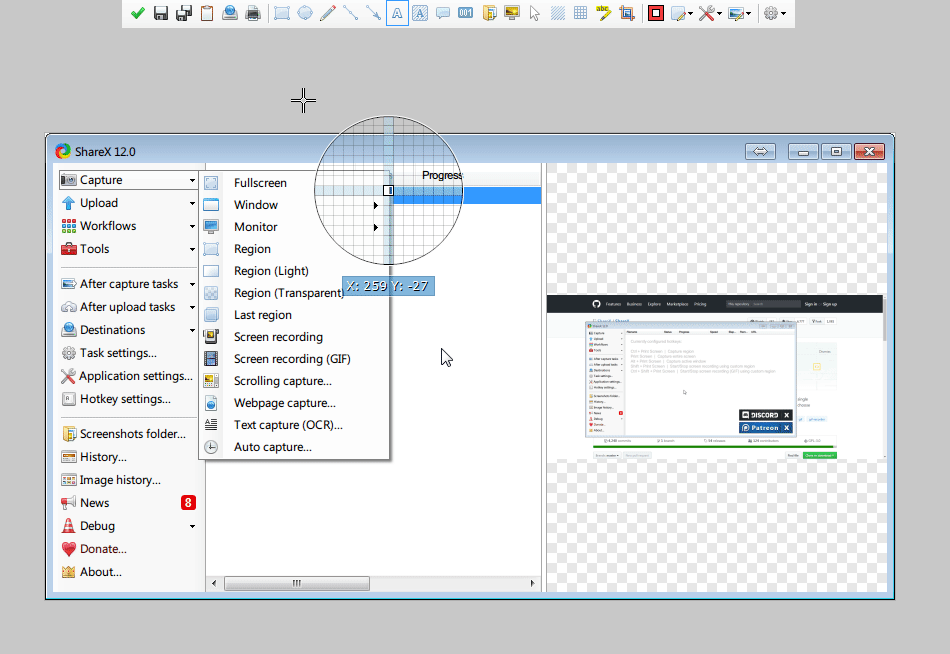
Capture

capture.png

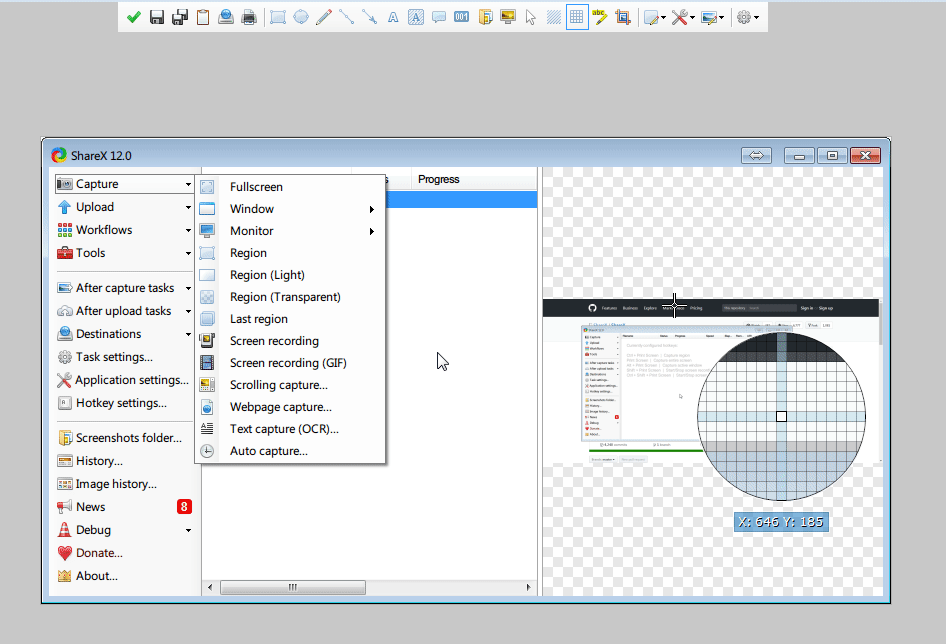
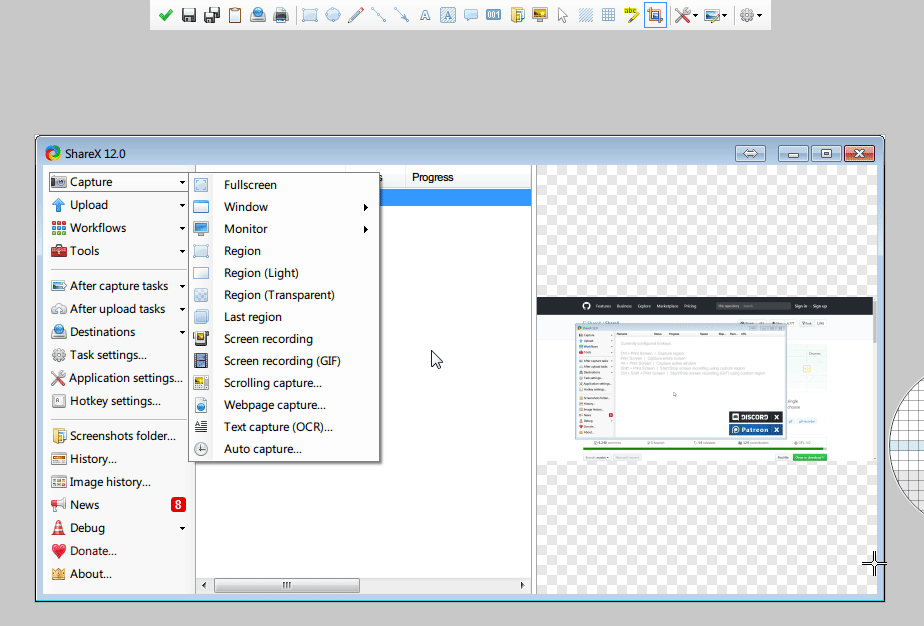
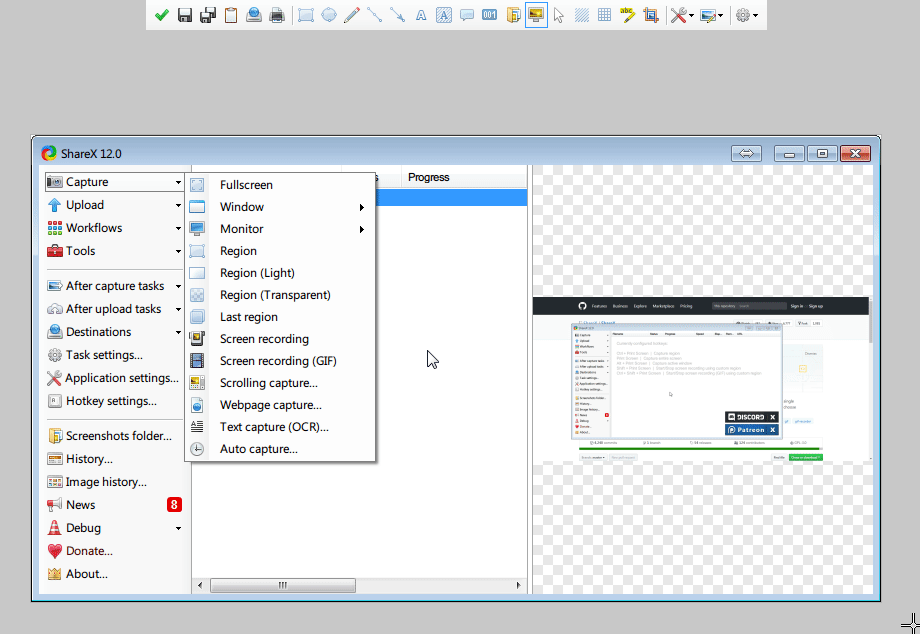
Plenty of capture mode to choose from. We got the usual Fullscreen and Region (custom) capture.

An advanced function like Screen recording (GIF) is just wonderful in creating a simple GIF right from this tool without much post-edit effort.

Scrolling capture works great in capturing multiple pages of a webpage into a single long image.

Text capture is can transform an image of the selected region into manageable text form using OCR.

windows.png

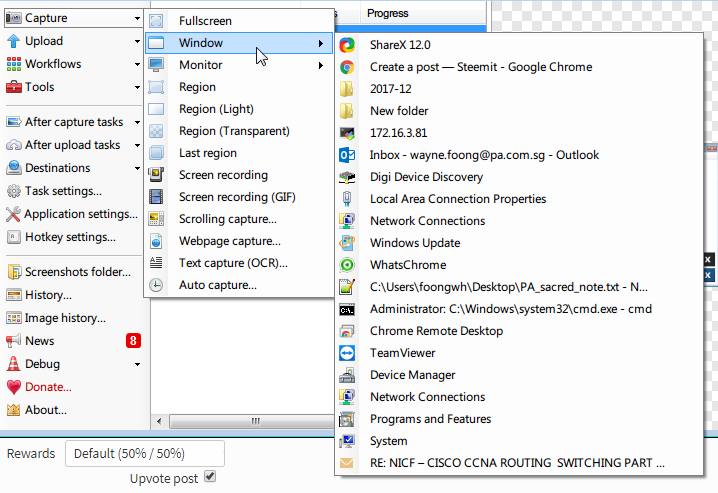
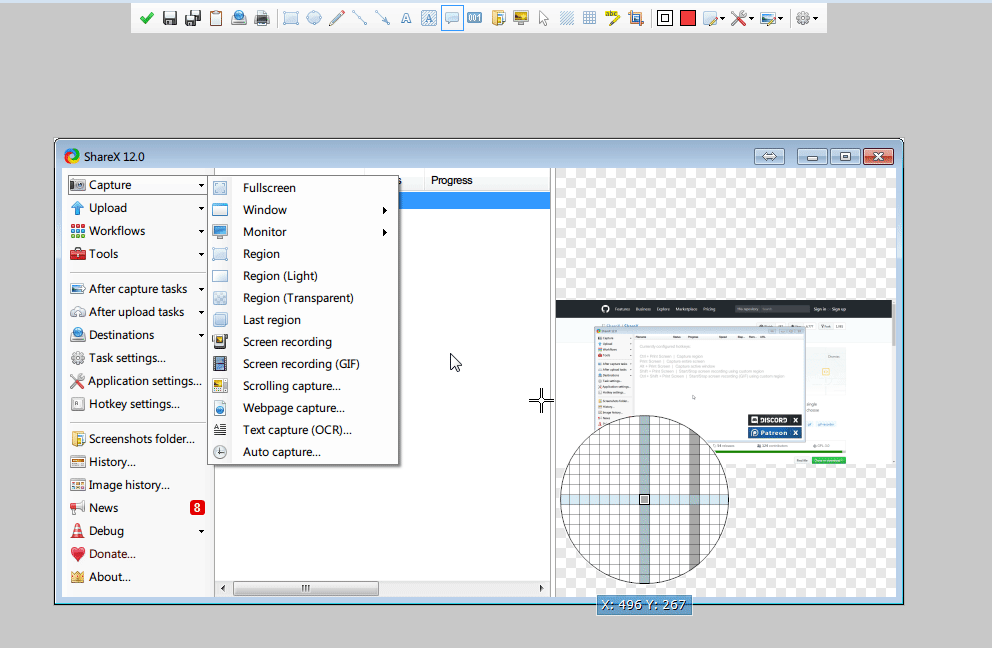
Under the Window, all the running windows in your session is showing on the list. Simply click one to capture it’s current window screen. No dragging and selecting is needed.

Same thing works if you have multiple monitors and you will be able to just print screen the whole monitor status with just a click.


Upload

upload.png

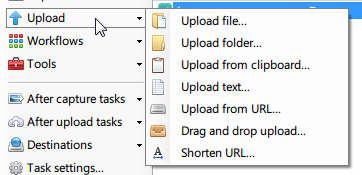
One of the features that make ShareX outstanding is the ability to upload almost anything to the selected destinations. Files, folders, text, or whatever in your current clipboard.

file uploader.png

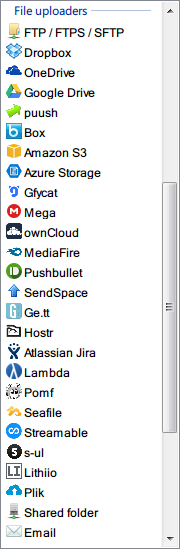
Each type of the uploading content will have it’s dedicated site to send to. These are all the file hosting site that you can authorize ShareX to have access to. From the famous Google Drive to Hostr which most people never heard of.

For text content, there are 10 options including Pastebin and Paste2.

For images, we have Imgur, ImageShack, TinyPic and so on.

From the famous Google Drive to Hostr which most people never heard of.

For text content, there are 10 options including Pastebin and Paste2.

For images, we have Imgur, ImageShack, TinyPic and so on.

Sharing new screenshot or record with them is now seamless and almost effortless.


Workflows

workflows.png

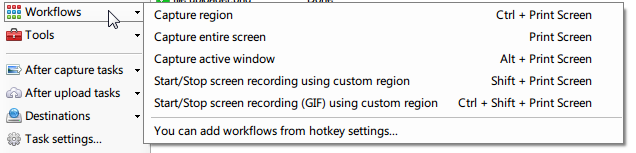
This basically is the list of hotkeys which to start certain capture mode. I personally find the Capture region and Start screen recording workflows to be my most frequent move. This is highly dependent on personal preference, set up your most used three to four workflows as hotkey is recommended.

To make sure the workflows is always ready to be summoned, it’s best to start the ShareX every time Windows boots up. Enable this option by Application Settings -> Integration -> Check the Runs ShareX when Windows start.

Once you are familiar with these hotkeys, screen capturing is as smooth as typing and clicking.


Tools

tools.png

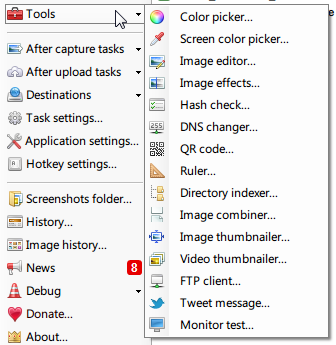
Now from the Tool list you can clearly tell the ShareX is not just powerful, but it is also overwhelming.

ShareX_2017-12-09_11-34-01.png

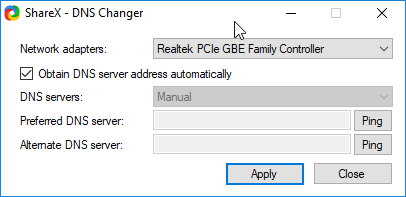
There is even a DNS Changer that you can set up preferred and alternate DNS server and apply. Not sure what a networking tool like this has anything to do with a screenshot software, but I guess this is to compliment the Uploading feature.

ShareX_2017-12-09_11-41-54.png

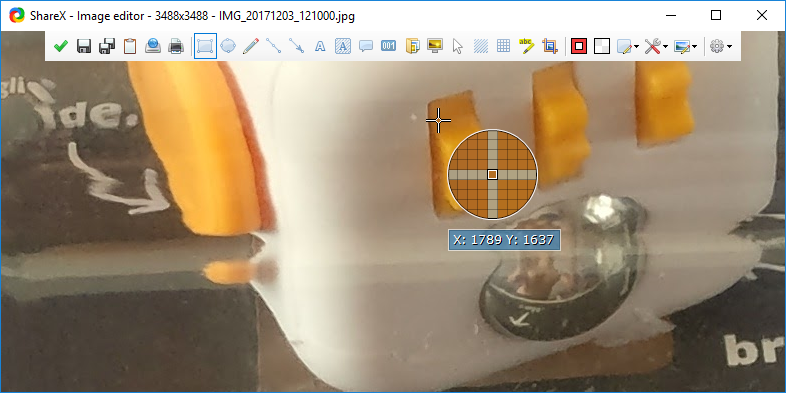
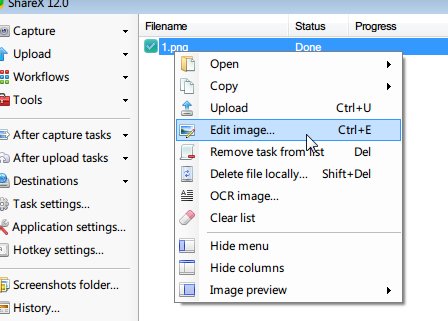
Image Editor is so far my most favourite tool which you can straight edit all the capture without having to rely on external editing software like the Microsoft Paint.

I’m not yet diving into every single tool listed here but the tool names suggest precisely what it does. I shall share more on this if I found any of them to be useful in the future.


After capture tasks

aftertake.png

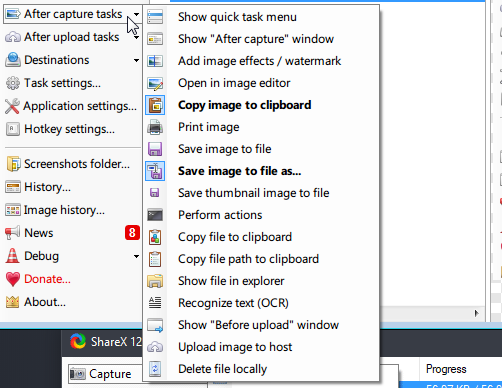
This is what decides the program to do after every capture. Enabled options are highlighted in bold characters.

In this case, I enabled the Copy image to clipboard and Save image to file as. The former save the most recent capture in clipboard so I can immediately Ctrl + V paste to external image editor or messaging application to share the picture. The latter ask me every time in what name and what place I would like to save the capture. You may change it to “Save image to file” if you desire the default setting.

Conclusion

The long features of ShareX may sounds overkill actually it is not. It is relatively lightweight compared to the Windows Snipping Tool, costs around 65Mb vs 6Mb while provides at least 15x more functions. It would be great even if you just make use of the capture function.

I shall share more about this amazing tool soon.

Try this out if you are screen capturing or recording a lot. You are welcome.


Posted on Utopian.io - Rewarding Open Source Contributors


This page is synchronized from the post: ‘Ultimate screen capture weapon, ShareX.’

How to add item into existing encrypted 7-zip archive without redo the whole archive

7-zip provides awesome and simple encryption method using the AES-256 algorithm that is handy to encrypt sensitive credentials like private keys for cryptocurrency. However, it doesn’t support to encrypt new files into an encrypted archive. The old and inefficient way to achieve this is to decrypt the old archive, make a new archive with the new items, and encrypt everything again. This is ridiculous when you just want to add a 10kb release note into a 1G archive. That computing power wasted could better spend at cryptocurrency mining.

The problem

1.png

In the encrypted 7z file we can see that the Encrypted column for the Old item.txt is a +, meaning this file is encrypted. You can practice this walk-through by creating a simple testing file like this.

2.png

Now we wish to add a new item to the current archive without decrypting. Drag and drop the New item.txt into the archive and press Yes.

3.png

Under Encrypted property, there is a - sign for the new item while the old item is still encrypted. By opening up both files, you still need to provide the password for the Old item.txt while New item.txt is can be opened without one.
This status remains even if you close and reopen the archive. There is no option in the tools or whatsoever to encrypt new files in the archive.


The Solution

4.png

How should we make things right by having the new file encrypted using same algorithm and password like the old file did?
Remove the new item first. Proceed to right click on the blank place of the archive and click on Open Inside.

5.png

Provide the password and now the whole archive is decrypted. Verify the encryption status by opening up the files again.

6.png

Drag and drop the New item.txt again to the decrypted archive and press Yes.

7.png

Now you will see both files are encrypted with the +sign. But you are still in the decryption status, to resume the encryption simply close the archive. The next time you open either file in the archive they will prompt you for the same password.


This trick is extremely handy when you want to add a few files to an encrypted archive without having to first decrypt the old archive and redo the archiving with encryption again. Cheers to the tons of time and computing power that you’ve saved!


Posted on Utopian.io - Rewarding Open Source Contributors


This page is synchronized from the post: ‘How to add item into existing encrypted 7-zip archive without redo the whole archive’

Encrypt cryptocurrency credentials using 7-zip

I’m a big fan of 7-zip for a long time.

7-zip is a free and open-source file archiver which also supporting AES-256 encryption in 7z and ZIP formats.

The AES-256 algorithm uses cipher key with length of 256 bits. To create that key 7-Zip uses derivation function based on SHA-256 hash algorithm. A key derivation function produces a derived key from text password defined by user. For increasing the cost of exhaustive search for passwords 7-Zip uses big number of iterations to produce cipher key from text password.

We will try to make use of this strong and free encryption feature to protect our vital cryptocurrency information.

OS: Windows 10 Pro 64-bit
7-zip version: 7-Zip 17.01 beta (2017-08-28) for Windows

The walk-through

a.PNG

I store all my wallets under a directory with simple architecture like this. We will use the STEEM wallet as example for this tutorial.


b.PNG

Inside of the STEEM folder there are two files, the portable Vessel wallet for Steem and a plain text file that stores all the private keys for Steem including Owner key, Active key, and Post key.

One must never store sensitive data like such digitally in plain text. And we are going to encrypt this text file using 7-zip.


c.PNG

Download latest version of 7-zip from the official site.

After installation, right click on the text file. 7-zip -> Add to archive.


d.PNG

You can either choose 7z or zip format in the Archive format. Make sure the encryption algorithm is set to AES-256, this should be the only option if you are using the latest version of 7-zip. Lastly, create a strong password which is very important to increase the difficulty when someone trying to crack the encryption. The stronger the password the stronger your encryption is.

Press OK to start the archiving.


e.PNG

Now you will have an encrypted archive in 7z format.


g.PNG

Open it up and to make sure you see the + sign under the Encrypted column. Unlock the file to check if everything is OK before next step.


f.PNG

Permanently delete the plain text file by Shift + Del keys. Make sure no copy of the text file should be existing in any place including the recycle bin.

Remember all the sensitive credentials in digital form should always be encrypted.


Posted on Utopian.io - Rewarding Open Source Contributors


This page is synchronized from the post: ‘Encrypt cryptocurrency credentials using 7-zip’

TechReview#1 - Unboxing of Ledger Nano S

As an owner of Trezor, I always want to get my hand on a Ledger Nano S as they are the most famous hardware wallet in the field. This was ordered at EUR 45 during the Black Friday deal which offered 21% discount, the overall experience is also complimented by the speedy DHL shipping service.

The Walk-through

IMG_20171203_111704.jpg

IMG_20171203_114212.jpg

The first impression was the packaging. I have to say Ledger paid close attention to their product packaging, the box itself just feels a lot more premium than the Trezor’s. The minimal design on the front is very much appealing too.


IMG_20171203_111733.jpg

The Nano S is secured firmly in the protective foam. So far there is no anti-tampering sticker on this box like what Trezor did with their box. Ledger claims that the wallet is built on a distinctive operating system (OS) called BOLOS which is tamper resistant.

The EAL 5+ certified secure chip we are using is the same one on your credit card or in your passport. Hacking a secure chip takes formidable efforts while information can be easily extracted from generic microcontrollers by amateurs.

In other words, Ledger Nano S is physically unhackable so they would not even bother to prove its authenticity with packaging tricks.


IMG_20171203_112006.jpg

IMG_20171203_112120.jpg

A small envelope consists of three pieces of paper. From left to right, they are:

  • Recovery phrase sheet to backup the seed while setting up the wallet. There are only one and I would suggest it is better to backup on another piece of paper as well. Redundancy never goes wrong.
  • Explanation of why the box isn’t using an anti-tempering sticker.
  • Simple instruction to start setting up the wallet.

IMG_20171203_112335.jpg

Bunch of accessories like the key ring, key chain, USB cable, and necklace.


IMG_20171203_113200.jpg

IMG_20171203_112728.jpg

The detachable necklace is what surprise me the most. Now you can carry the precious wallet with all fund inside with you whenever you go. Although I doubt that would be a good idea.


Front and back of the Nano S. An interesting phrase Vires in numeris was printed on the back. After some googling, that is a sentence in Latin meaning “Strength in numbers”, which is also the tagline of Bitcoin. Indeed, the whole idea of cryptocurrency is just dealing with all kind of numbers.


IMG_20171203_152337.jpg

Two buttons at the bottom of the screen. They will be responsible for all the operations.


ezgif.com-video-to-gif.gif

Nano S use a USB drive-like design with a joint to protect the screen and USB port. As you can see in the GIF, the joint is strong and doesn’t wobble at all. The sturdiness of small detail like this definitely convinces users on the build quality.


The Thoughts

In the sense of packaging and build quality, I would say Ledger Nano S with a cheaper price tag already surpassed Trezor in many ways. More accessories, beautiful box architecture, and great wallet design.

Of course, we cannot judge the wallet simply by its physical appearance. We shall cover more in the wallet configuration and software part. Til then.


Posted on Utopian.io - Rewarding Open Source Contributors


This page is synchronized from the post: ‘TechReview#1 - Unboxing of Ledger Nano S’

Your browser is out-of-date!

Update your browser to view this website correctly. Update my browser now

×